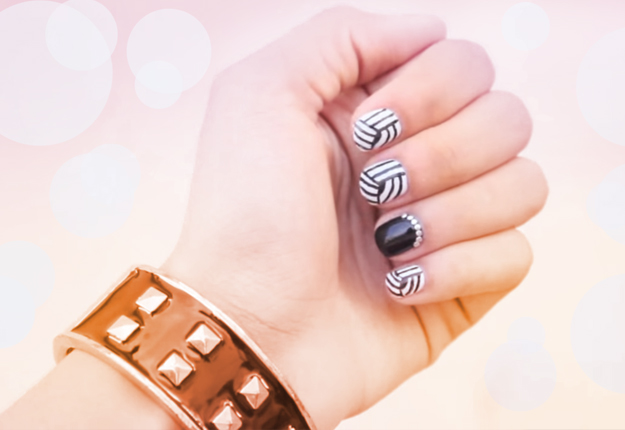
I saw this nail art idea in a magazine and just had to try it. I found this cool Youtube video that shows you exactly how to do it. Was I ever pleased to learn it did not turn out perfectly to still look awesome. Follow the step by step tutorial and you will have cool optical illusion nail designs in no time!

Photo Tutorial & Instructions:
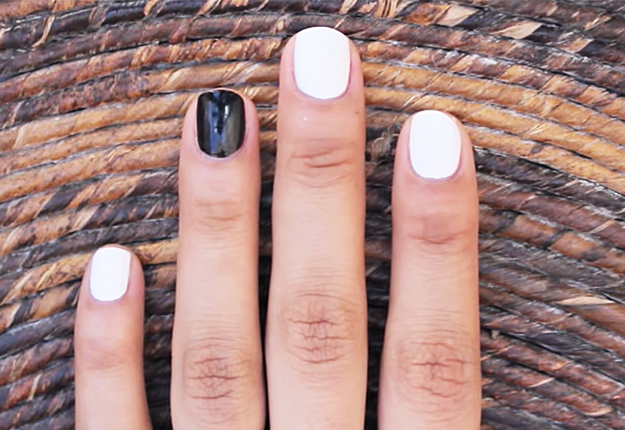
Step One
Paint your nails white except for the ring finger and thumb.
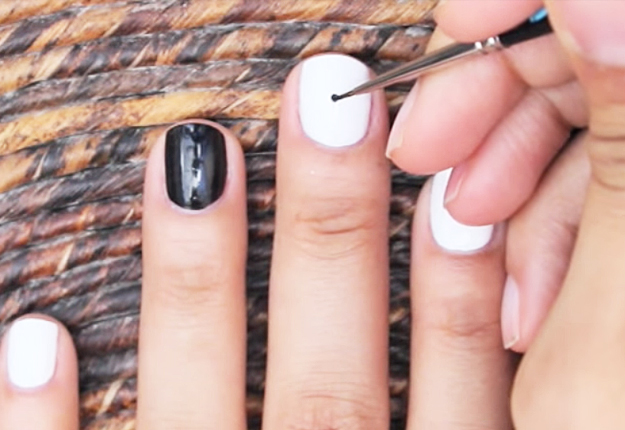
Step Two
Using a nail polish, apply a small black dot at the center of the nail that has been painted white.
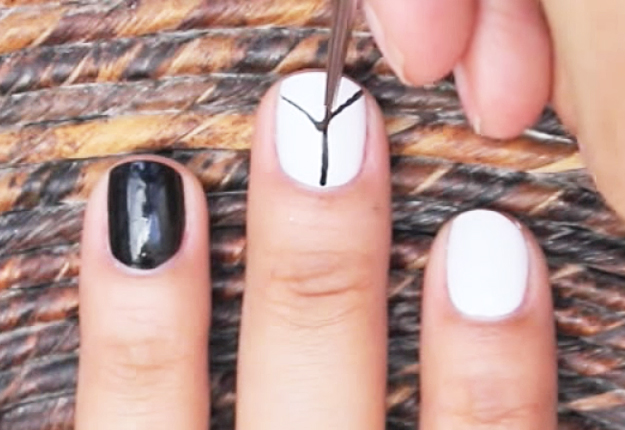
Step Three
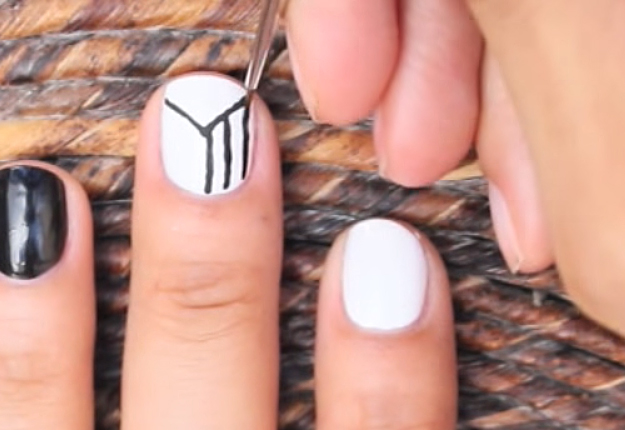
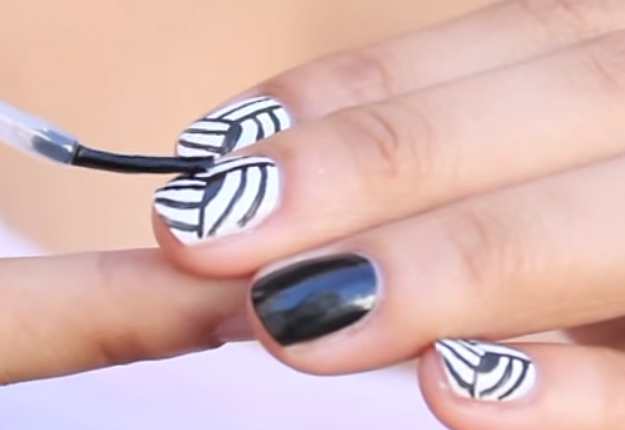
Paint a thin “Y” shaped line connecting from the center as shown below.
Step 4
There are now 3 sections on your nail. Draw 3 vertical lines on the lower right section
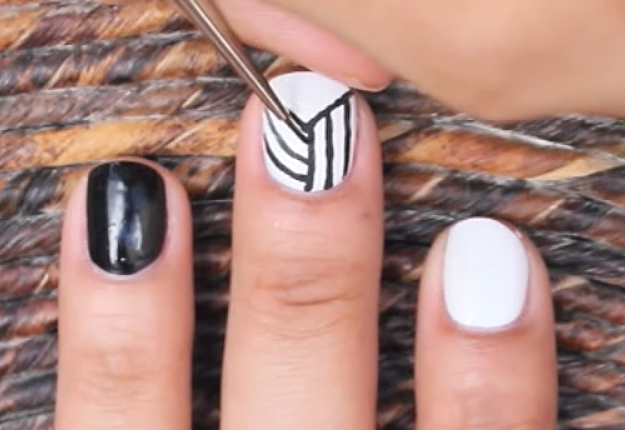
5. Draw 2 curved lines on the left section.
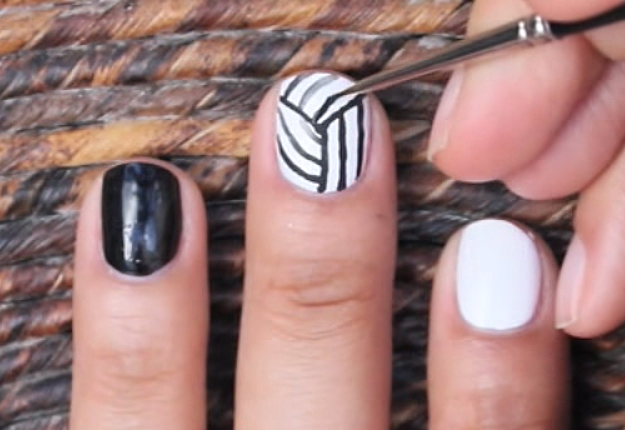
6. Then draw another set of three curve lines on the top section.
7. This is how the design should look like after repeating the steps for the rest of the nails.
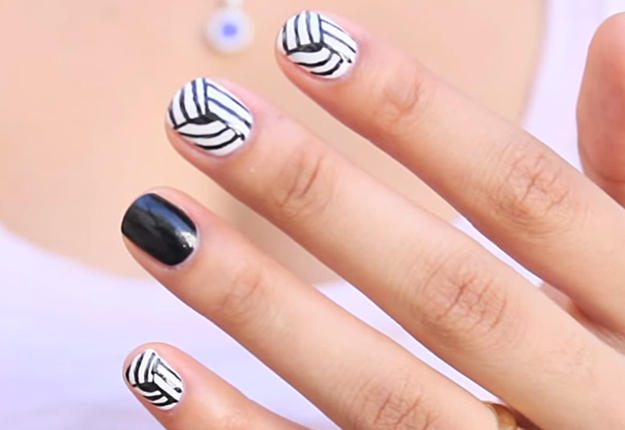
8. Apply a topcoat on your finished design.
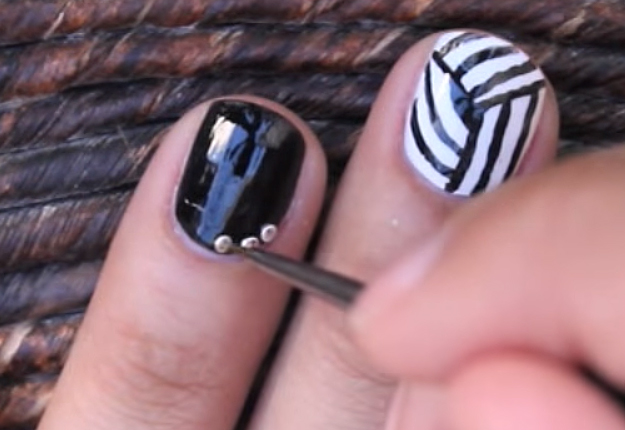
Optional Design:
You can add tiny studs along the cuticle area of the nail. Apply a top coat on your finished design and you’re done!